Building a Hacker Sticker Pipeline
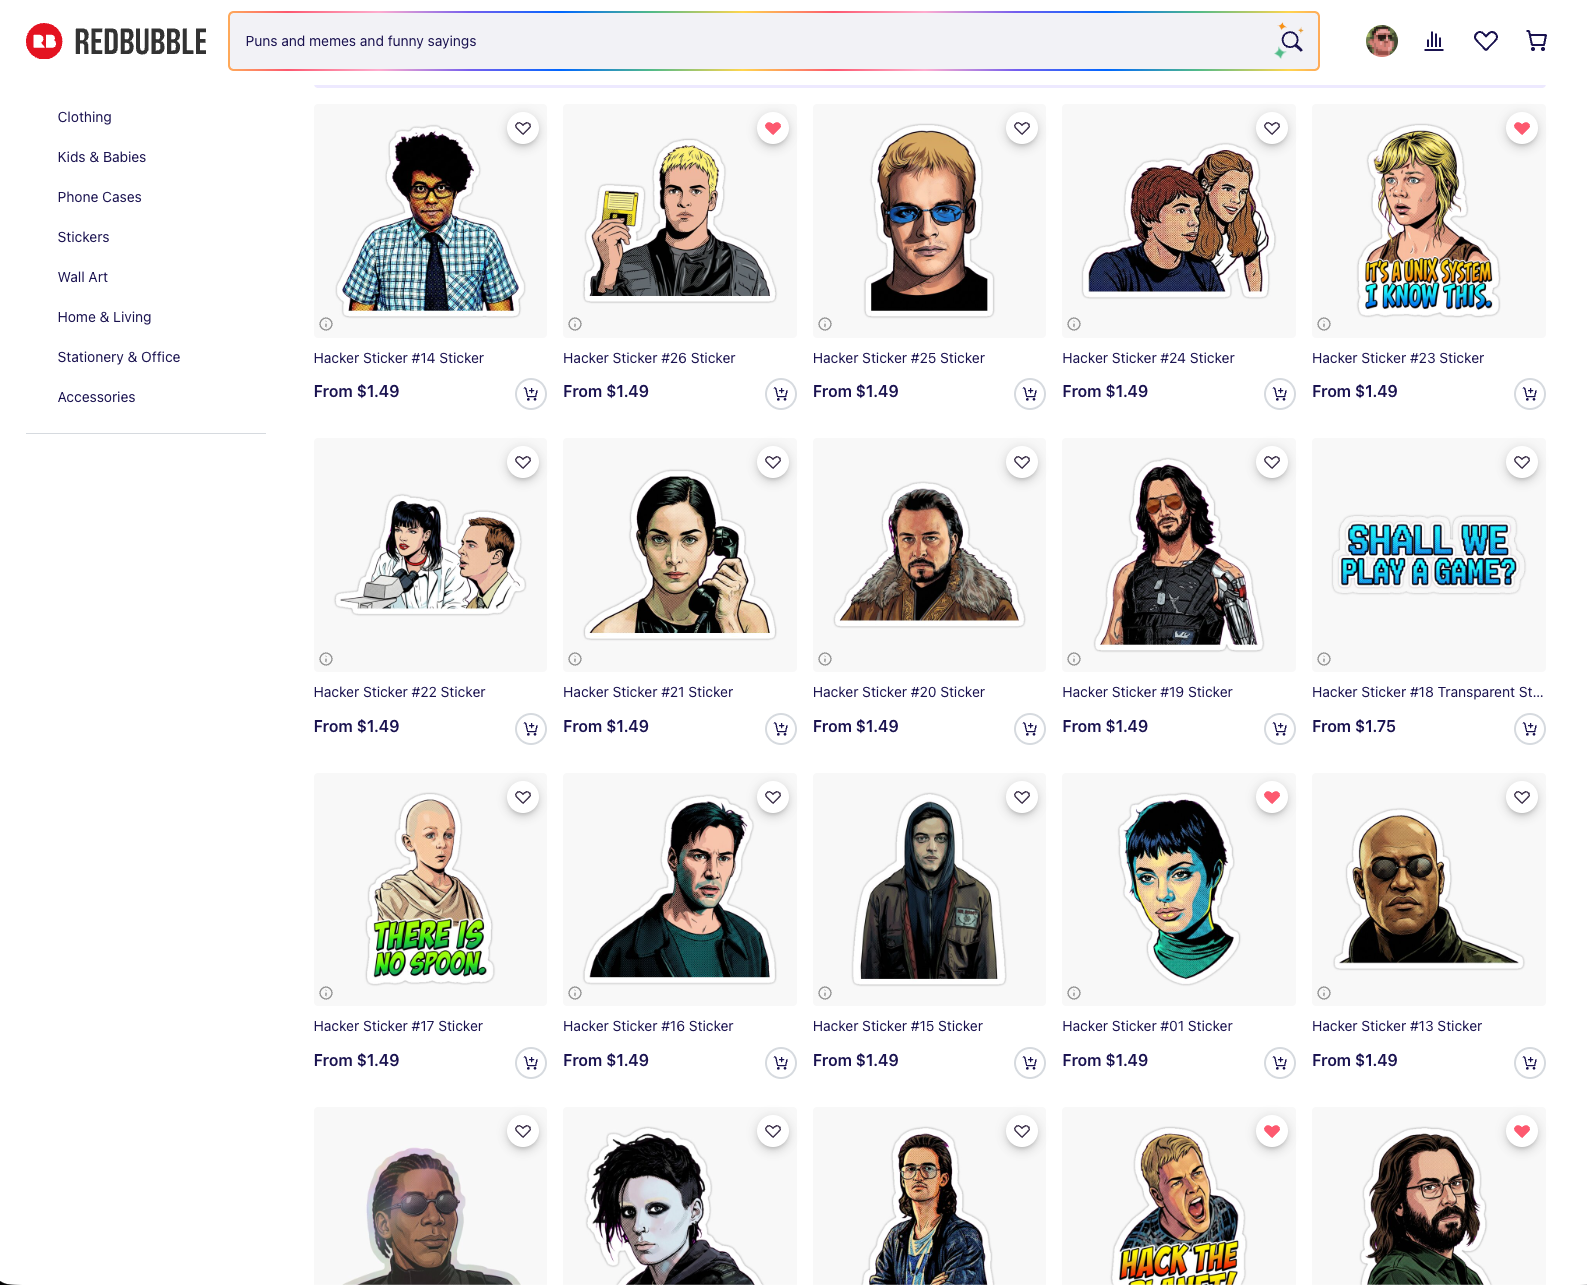
Last week I made a series of hacker stickers. Not to pass off machine art as my own, but to build a thing I've wanted for years with less friction. Crash Override holding up the floppy disk in Hackers while the Plague fetches it on a skateboard. Lex in Jurassic Park saying "this is Unix, I know this." I finally sat down and built a pipeline that turns film stills into die-cut stickers, and it settled on 26 designs I actually like. They're online here, at cost, 0% markup.
Two things matter to me up front.
I'm never trying to create art with AI and pass it off as human-made. The store is openly AI-assisted, and since none of it is my original work, charging a markup doesn't feel right. Cost only.
And the taste stays human. Our squishy brains still control the direction. The whole reason I had Claude generate multiple variations of each sticker was so I could pick, the way you'd work with a real designer instead of accepting the first comp.
Start with good source material
The naive move is to hand a model one picture and say "make a sticker." That's not what this was.
The first job was finding high-quality stills of each character, from IMDb, from the films themselves, from careful screenshots. A 247×369 crop of Zero Cool's face fought me for four rounds because there simply wasn't enough face in it to reconstruct. Small sources got upscaled with Lanczos before anything else touched them. Garbage in, garbage sticker.
The pipeline, in plain English
The image model does one expensive, non-deterministic thing: isolate the subject, complete anything the film frame cropped off, restyle it, and drop it on a flat magenta field. That render gets cached.
Everything after that is ImageMagick, deterministic and free. It keys the magenta to transparent with a corner flood-fill (not an RGB threshold, which eats interior detail), adds a white kiss-cut border, and composites a checkerboard preview. Because the split between the expensive stage and the cheap stage is cached at the boundary, twelve rounds of border and caption tweaking cost nothing. No API calls to nudge a keyline 4 pixels.
The model was gemini-3-pro-image-preview, about $0.13 an image. Total spend across roughly 125 renders came to around $16. Bun and TypeScript for the orchestration.
Have the agent build you a way to look
The most useful thing I asked Claude for wasn't the stickers. It was a review tool.
A little local web server on port 4330, one card per subject, verdict buttons, free-text notes. Below each image, a version stepper. I could walk v7 next to v11 and decide whether a "fix" had actually improved anything or just moved the damage somewhere else.
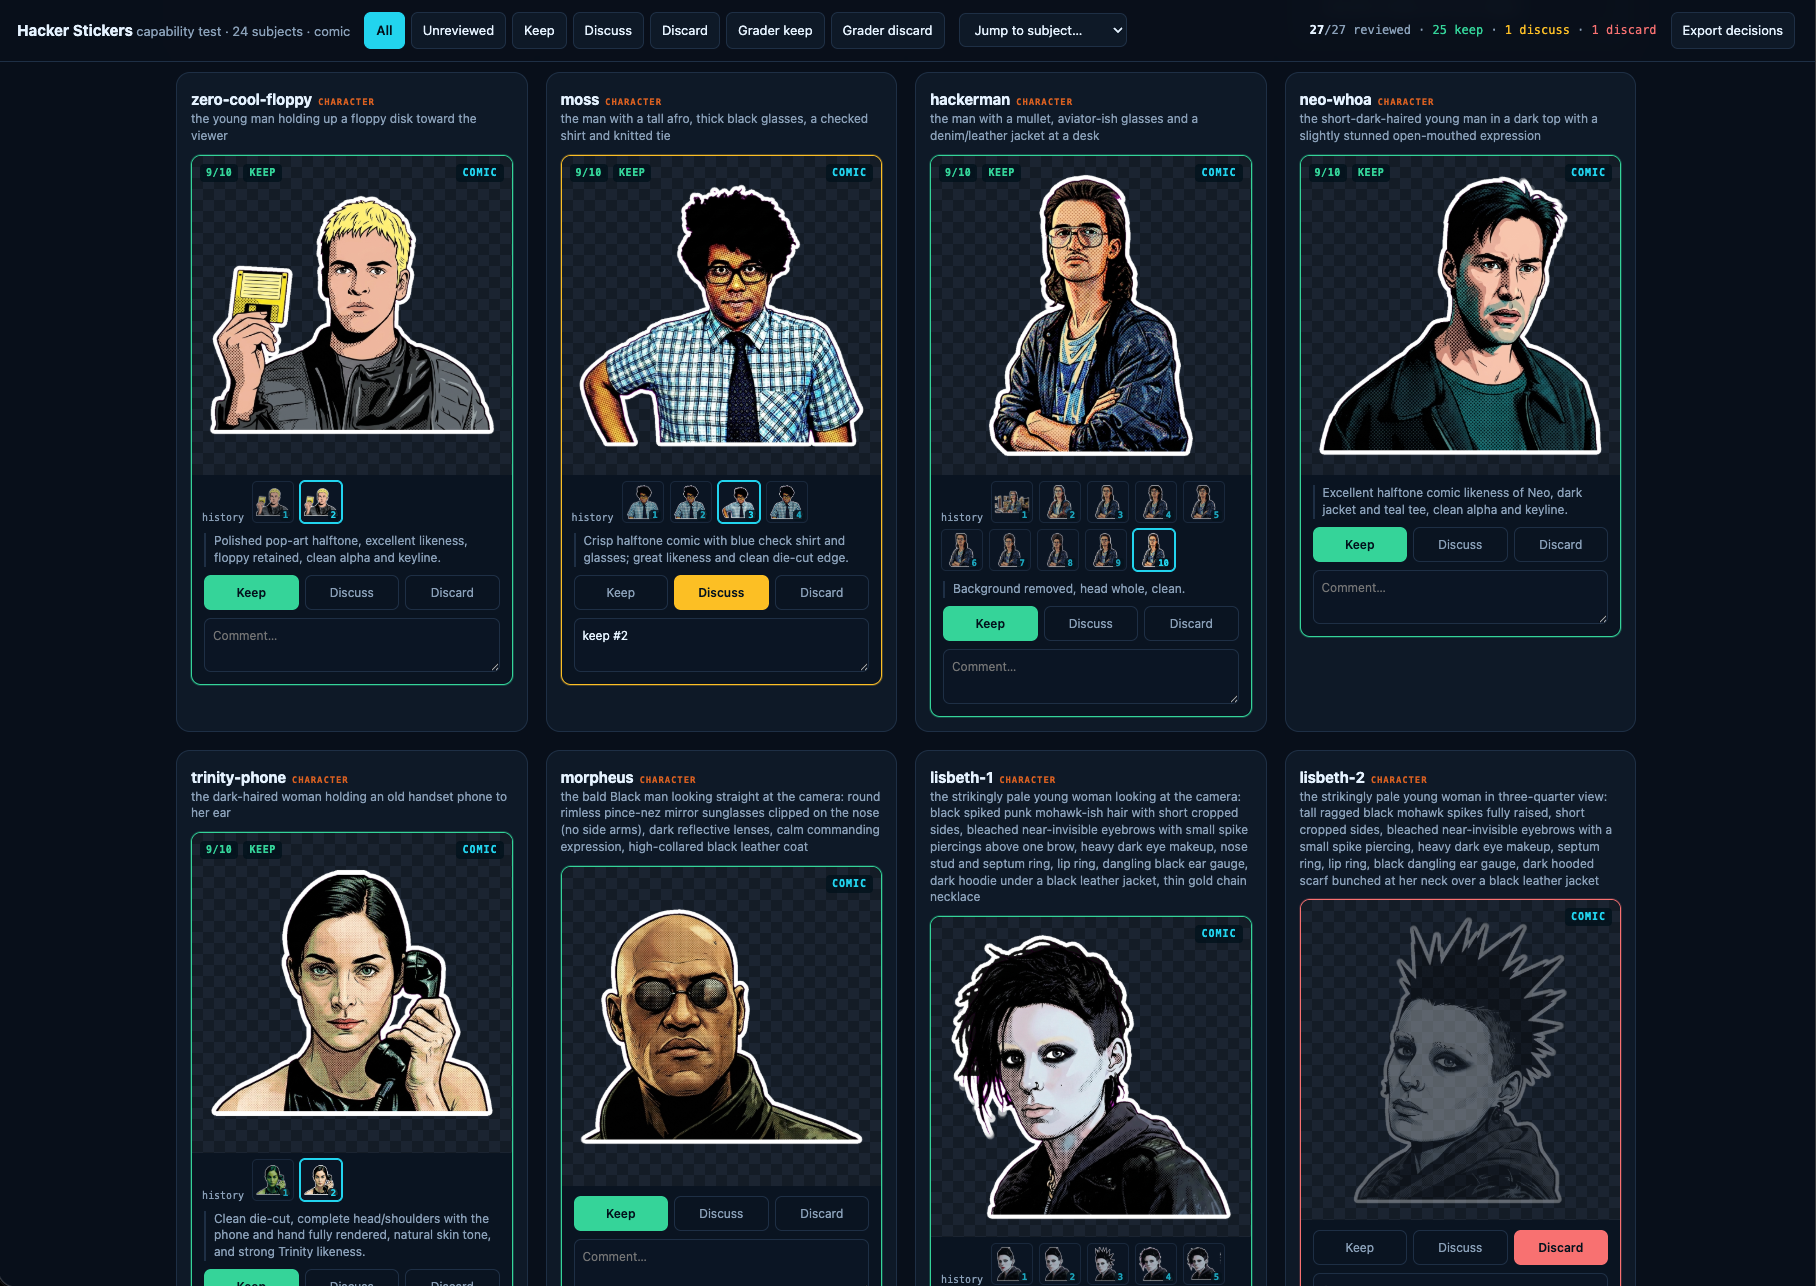
That stepper only works because of one rule I gave Claude and never relaxed: never delete or replace intermediate work. Every version is snapshotted, append-only, deduped by hash. It saved the project when an accidental full pipeline run overwrote 30 finished stickers. Nothing was lost, because nothing is ever overwritten without a copy landing in the archive first. Build that before you need it.
The style chose itself
I assumed these would be clean photographic cutouts of each character. Claude would isolate the subject, and that'd be that.
Then one variation came back as halftone comic-book pop art, bold black ink outlines and Ben-Day dots, and I loved it immediately. Every sticker is comic now.
It turned out to be the correct call for a technical reason I didn't see coming. Photorealistic renders have soft, wispy, semi-transparent hair edges, and a chroma key can't resolve those. They shattered into floating fragments. Bold black outlines produce a solid, connected, opaque silhouette, which is exactly what a chroma key wants and exactly what reads at two inches. The style that looked best also cut cleanest. I'd love to say I planned that.
Edit, don't reroll
The single biggest lesson. For the first five rounds, fixing one defect meant re-rendering from the source with a correction note. That fixed the shirt and broke the face. Fix the face, break the crop. Subjects oscillated instead of converging.
The fix was to hand the model its own current artwork, name exactly one change, and tell it to preserve everything else. Once a sticker was 90% right, editing kept the 90% and only touched the 10%. Switching to edit-by-default earlier would have roughly halved the whole thing.
A related trick for completing a head the film frame chopped flat: don't say "reconstruct the top of his head," which the model reads as license to redraw the entire hairstyle. Instead, pad the canvas with magenta and say "fill only that gap." Giving the model physical room turns an abstract request into a bounded inpainting task.
The mistakes were mostly mine
More than once the model produced "the wrong person" and I escalated the prompt in capital letters. The Plague came back wrong for four rounds. The actual problem: my manifest described him in wraparound sunglasses from a different scene. In this still his eyes are visible. The model was faithfully following a bad instruction the whole time.
Same story with Lisbeth's hair. I wrote "spiked," got spikes, and it's a floppy mohawk. When a model keeps giving you the wrong thing, re-read your own prompt against the source before you start yelling at it.
Adding capital letters is not iteration. Changing the information you give it is.